With OneVenue you can distribute swag to your attendees.
-
Swag Bag
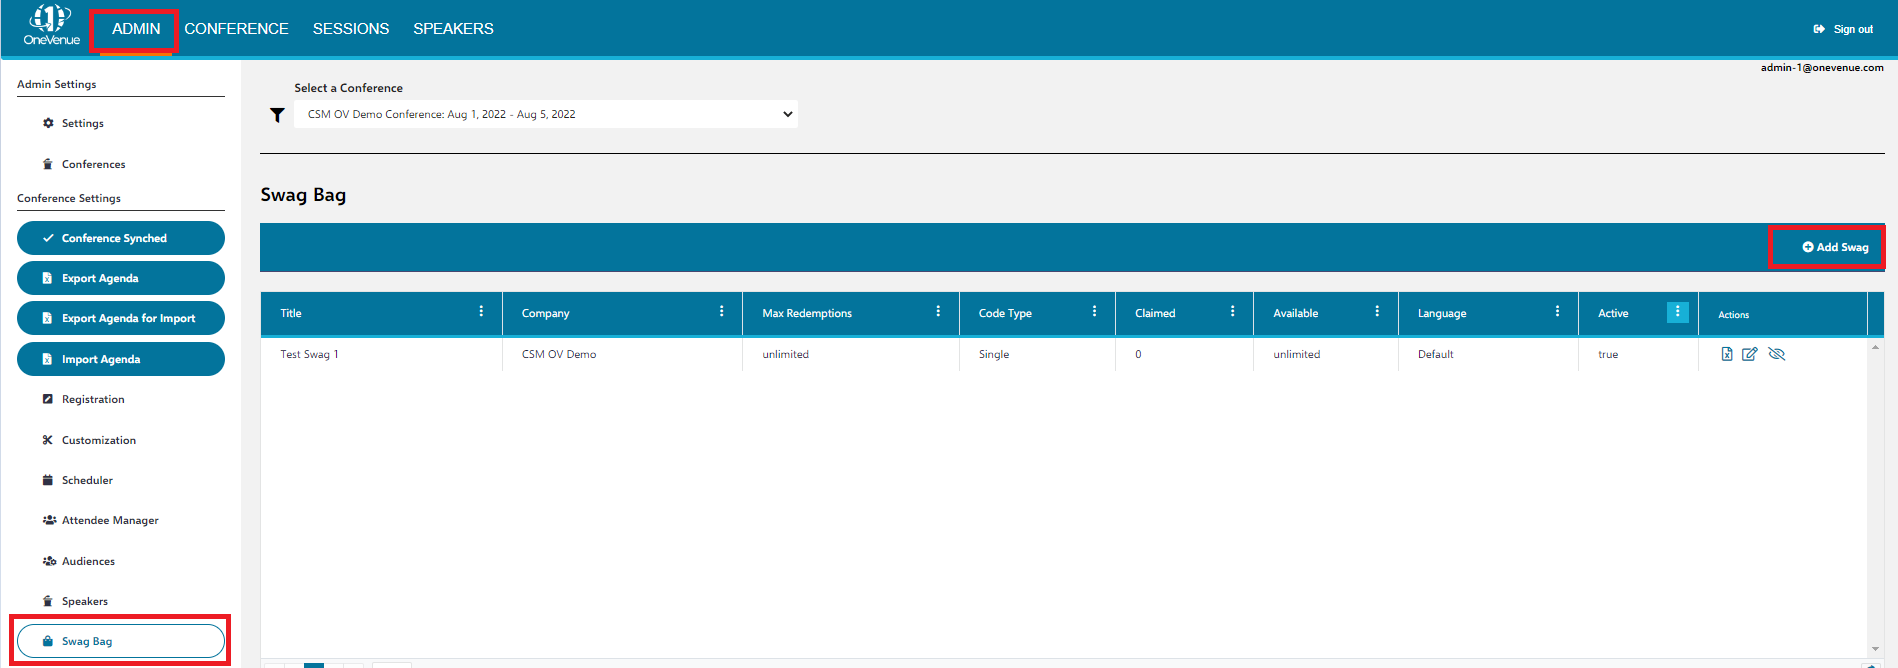
- On the Admin page of OneVenue, select Swag Bag on the left. Here, you can provide gifts for your attendees. Click Add Swag.
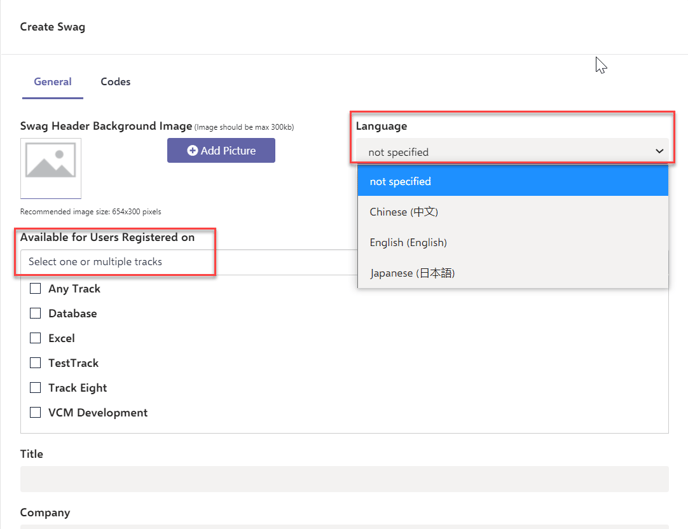
- In the Create Swag dialog, you can make the swag available to attendees on all or specific tracks via the 'Available for Users Registered On' dropdown. You can also specify a language so that your attendees know in which language the swag item is presented. You can then enter any company information in the boxes and click Next.
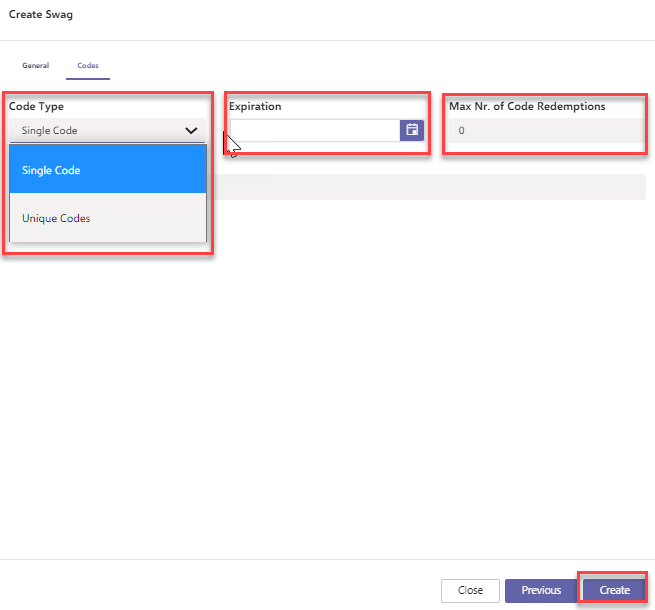
- You will then be brought to the Codes tab of the Create Swag dialog. Here you can enter any codes for the swag you're providing such as food credits. The Code Type dropdown let's you choose between a single code for every permitted attendee or unique codes which you can then import. You can also set the maximum number of code redemptions allowed in your conference as well as list the code's expiration date. You can then click Create.
- Back on the Swag Bag tab, you can edit, remove, and export the codes of your swag items as an Excel file using the Edit Swag, Remove Swag, and Export Codes buttons listed under the Actions column on the right of each swag item. If you remove a swag item, you can restore it using the same button which will then be called Restore Swag.

- On the Admin page of OneVenue, select Swag Bag on the left. Here, you can provide gifts for your attendees. Click Add Swag.