Building your Event Schedule
-
Best Practices for Virtual Agenda Design
-
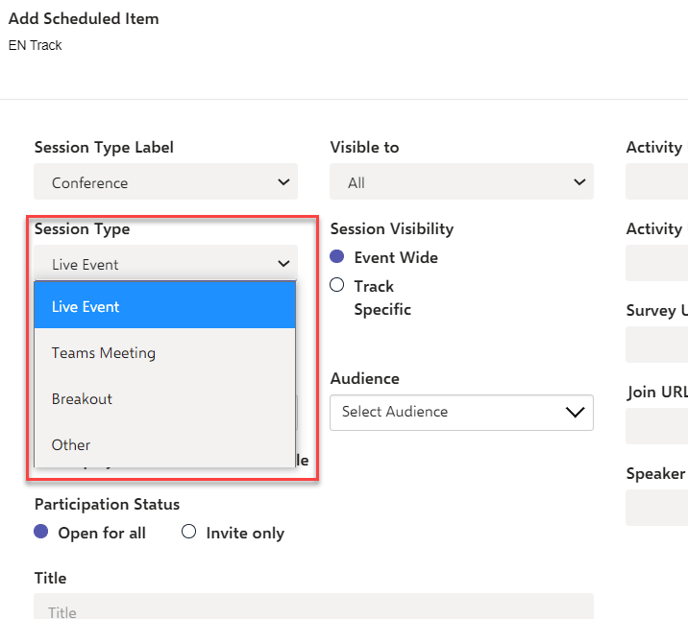
Deciding on a Teams Live Event, Teams Meeting, Breakout, or Other Session Type
- Live Events
- Designed for webinar-style deliveries in which only the presenter(s) speaks.
- For larger audiences of up to 20k attendees.
- Teams Meetings
- Designed to be more interactive where attendees and presenters can speak and interact with and other.
- For smaller audiences of up to 300 attendees
- Breakout Sessions
- Breakouts enable you to split your registered attendees into smaller groups in the form of Teams channels rather than having them all meet together at once.
- Other Sessions
- Other sessions are essentially sessions designed for miscellaneous activities such as lunch breaks. Basically, you select the Other option under Session Type, and provide a title such and other required information such as descriptions, timing, etc.
-
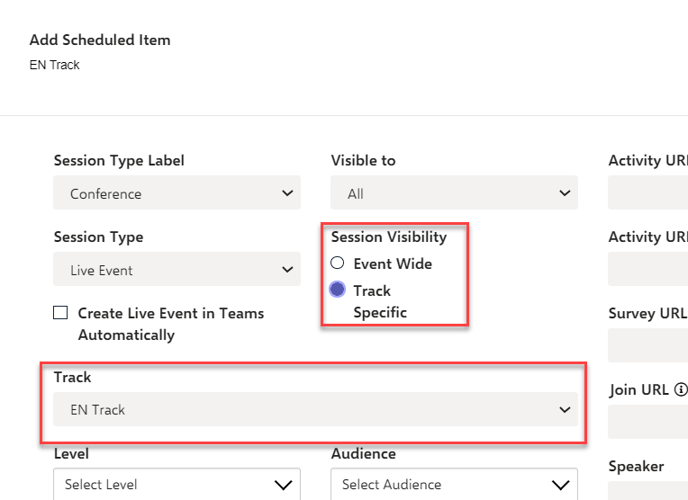
Configuring Session Visibility
- When creating a session, you have the option to make it visible for users either Event Wide or Track Specific. When a session is set to Event Wide, all users in the conference can view and register for it. When a session is set to Track Specific, all users in the session's selected track can view and register for it.
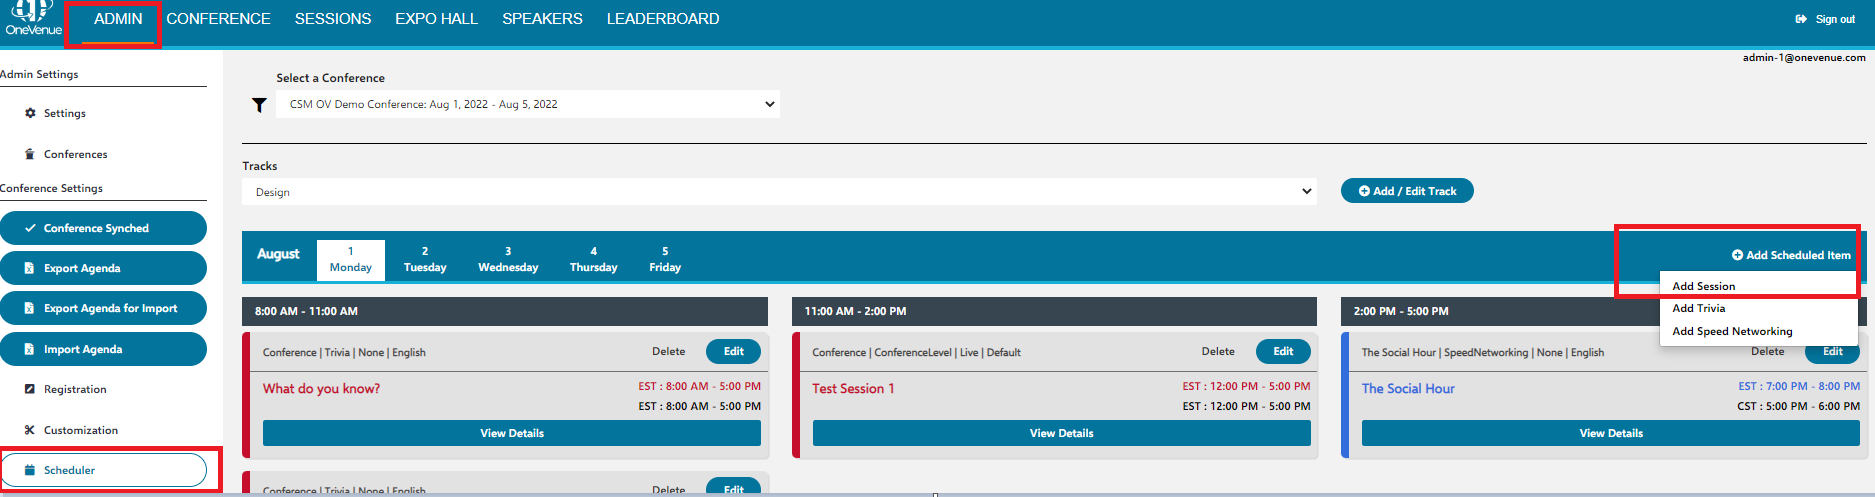
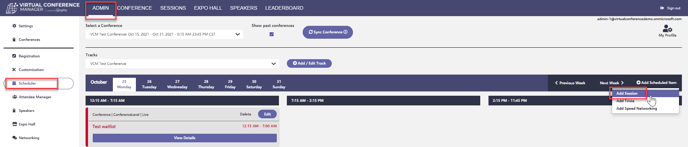
- Click Scheduler on the left. Click Add Scheduled Item and click Add Session. Under Session Visibility, you can select Event Wide or Track Specific. When you select Track Specific, you can then select the track to which the session will be visible.
-
Configuring Languages and Time Zones
- When creating your conference, you have the option to select supported languages and time zones. These selections enable you to add labels to your scheduled items, indicating which time zone you are using for the scheduled item and which language you will render your content. The language labels can be applied to your conference resources and swag bag items as well.
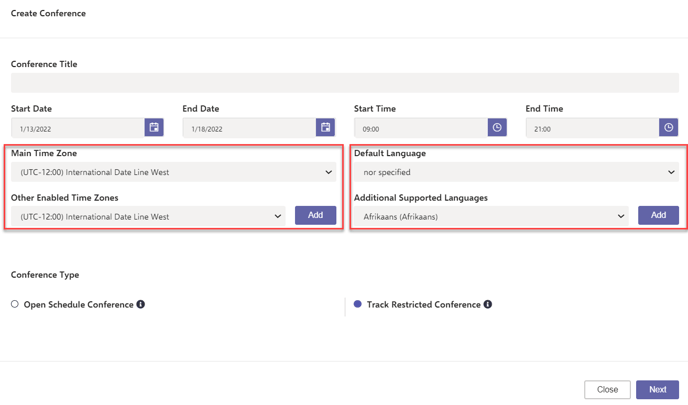
- Click Scheduler on the left. Click Add Scheduled Item and click either Add Session, Add Trivia, or Add Speed Networking. On each of the dialogs, you will see that you can apply a language and time zone that you earlier selected for your conference to the scheduled item you're creating via the Language and Time Zone dropdowns.

-
Configuring Levels and Audiences (Session Schedule Enabled Only)
- In a Session Schedule Enabled conference, you can create levels and audiences that essentially serve as tags so that you can have customized filters for your sessions, trivias, and speed networking.
- On the Admin page within OneVenue, click Customization on the left. From here under Audience you can click Add Audience and under Level you can click Add Level. For both dialogs you simply need to enter a title such as 'New employees' for the audience or 'Intermediate' for the level.
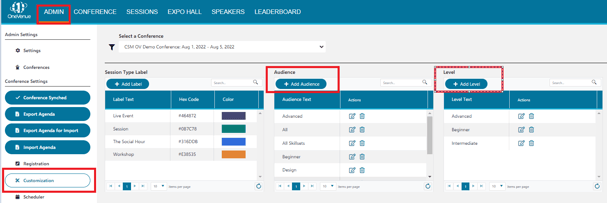
- Click Scheduler on the left. Click Add Scheduled Item and click either Add Session, Add Trivia, or Add Speed Networking. On each of the dialogs, you will see that you can apply your Levels and Audiences to the scheduled item you're creating via the Level and Audience dropdowns.
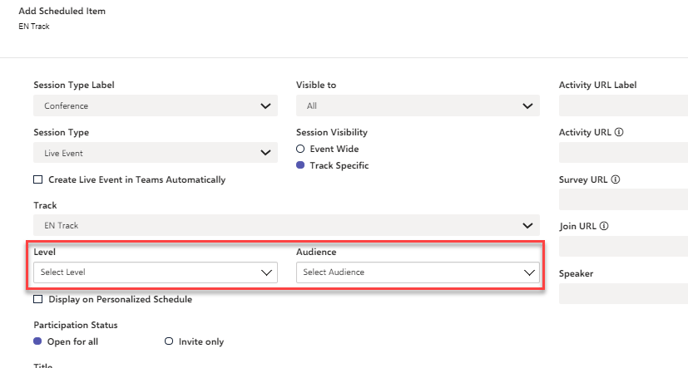
- Now when attendees are searching for sessions to join, they can filter for sessions based on their level and audience.
-
Customize Sessions Labels and Colors
- Similar to Levels and Audiences, on the Customization page you can also create labels that serve as tags so that you can have customized filters for your scheduled items. Unlike an audience and a level, a label can also have a color applied to it.
- Click Add Label under Activity Labels. Similar to the Add Level and Add Audience dialog, you can enter a title for your label. However you can also apply a color to it as well via the Label Color dropdown and the Hex Code box. Finally, click Create Label.
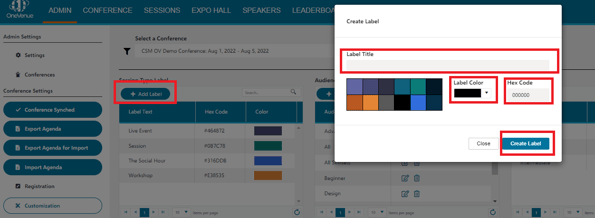
- Now when attendees are searching for sessions to join, they can filter for sessions based on any labels you apply as well. In the filtered results, the label and color will be applied to the session well.
-
Configuring Invite-Only Sessions
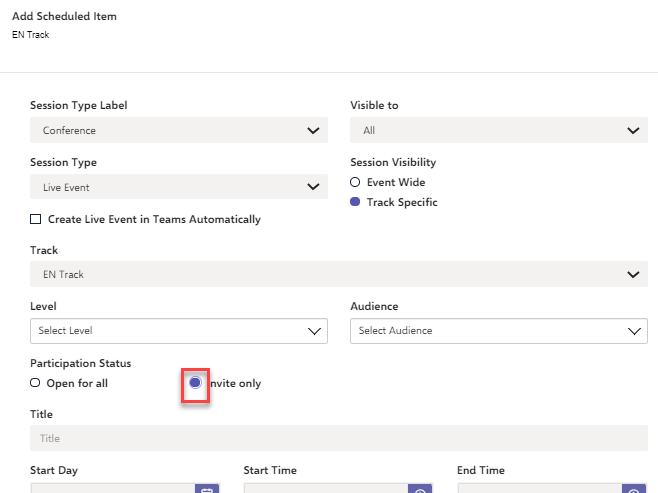
- An invite-only session is a session that can only be accessed by specific attendees that are selected after the session is created.
- On the Scheduler page, click Add Scheduled Item then Add Session
- In the Add Scheduled Item dialog, you have the option to select Invite Only under Participation Status.
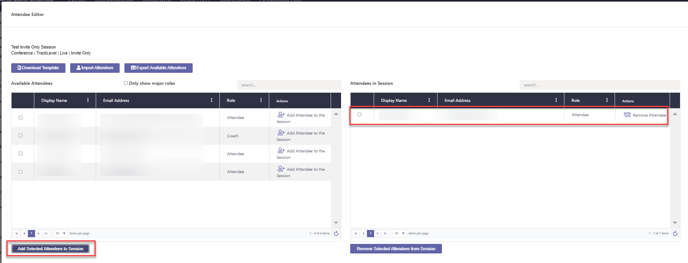
- Once you create the invite-only session, click Edit Attendees under the session you created listed in the schedule.
- On the Attendee Editor dialog, you can now select whichever attendees you would like under Available Attendees on the left then click Add Selected Attendees to Session. The attendees you selected will now appears under Attendees in Session on the right. The session will now appear in the schedules of the attendees you selected.
-
Configuring Wait Lists
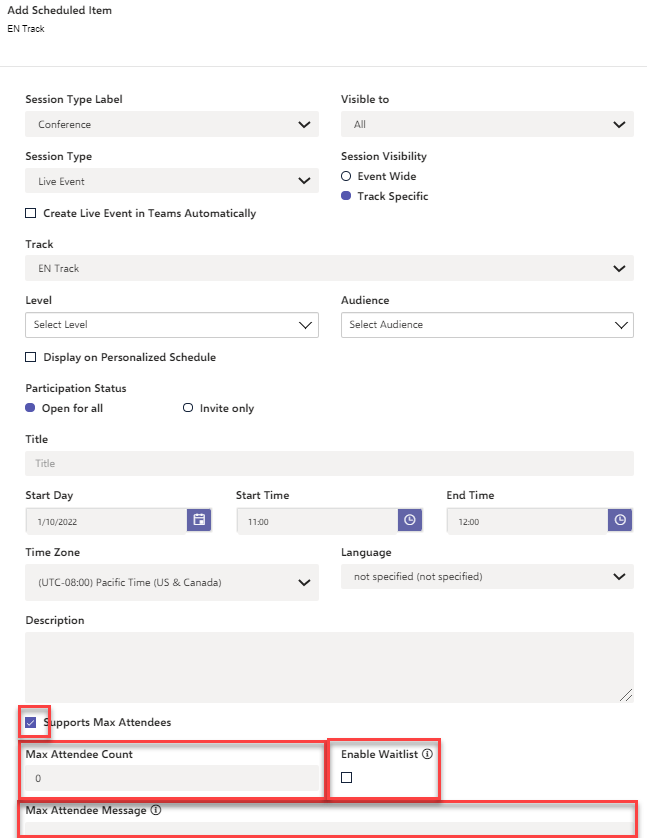
- When creating a session, you can enable the wait list feature so that when the maximum number of attendees registered to a session is reached, an attendee within the waitlist can automatically take the registration spot of a registered attendee who chooses to unregister.
- On the Admin page within OneVenue, click Scheduler on the left. Click Add Scheduled Item then Add Session. In the Add Scheduled Item dialog, you have the option to check the Supports Max Attendees box. Now you can enter the Max Attendees Count, the Max Attendees Message, and you can check the Enable Waitlist box so that when the maximum number of attendees is reached, any further attendees can be added to the waitlist.
-
Configuring Breakout Sessions
- Breakouts enable you to split your registered attendees into smaller groups in the form of Teams channels rather than having them all meet together at once.
- On the Scheduler page, click Add Scheduled Item and click Add Session. In the Add Scheduled Item dialog, you have the option to change the Session Type dropdown to Breakout.
- You can then set the Group Privacy Settings. Private channels in a group are only visible to those registered attendees who are members of the channel while public channels can be viewed by all registered attendees in the session. You can have a maximum of 25 attendees in private channels and a maximum of 175 attendees in public channels. Attendees with the coach and staff roles are automatically added to private channels. Attendees with the organizer role are added to all channels.
- Registered attendees with the coach and staff role are also included as tags so that users can easily contact coaches and staff members during their events using the @Coach and @Staff tags. The tags can also be customized when creating the group. Each tag consists of a maximum of 25 attendees. In order to use the tags, there must be attendees with the coach or staff role in the coach or staff channel.
- You can also set the Table Fill Pattern. If you choose to Fill Up Each Table Sequentially, your registered attendees will be added to channels on a first come first serve basis. So registered attendees will be added to one channel until the number of Users in the Group that you set is reached. Then another set of registered attendees will be added to another channel and so on. If you choose to Evenly Distribute Users Between Tables, your registered attendees will be distributed across the channels evenly.

-
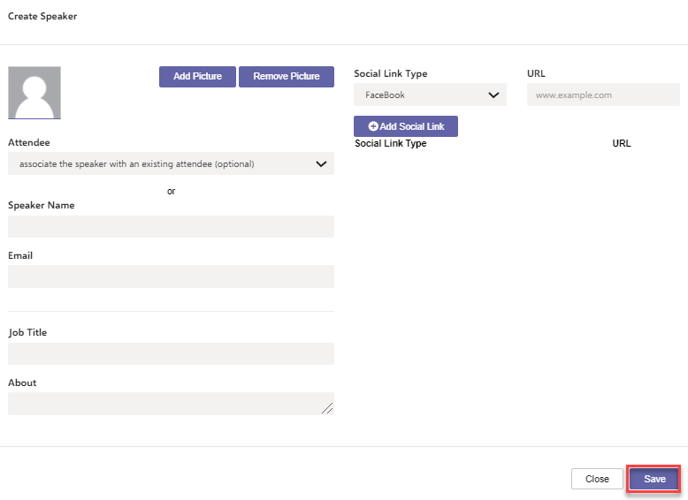
Configure and Link Speakers
- A speaker is essentially someone with posted contact information that can be added to a conference without necessarily being part of the conference as an attendee
- On the Admin page within OneVenue, click Speakers on the left then click Add Speakers. In the Create Speaker dialog, you can enter the required speaker information then click Save.